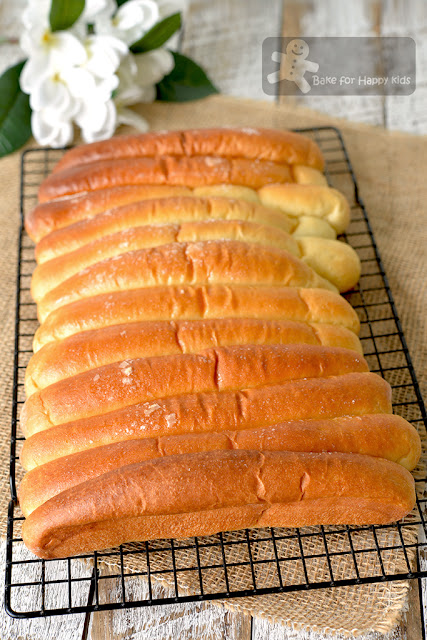
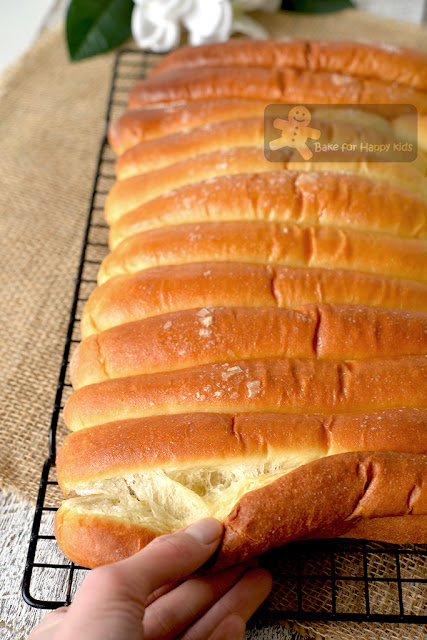
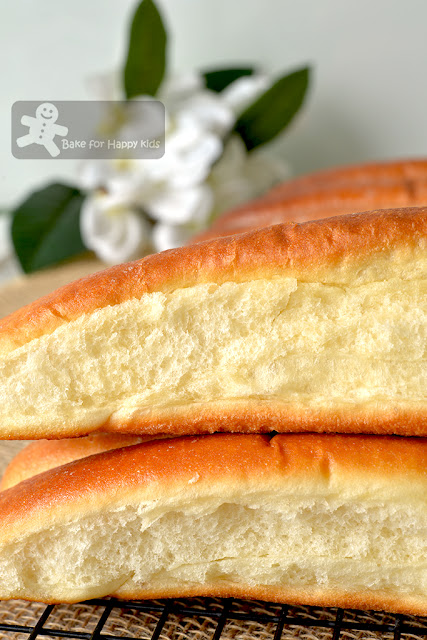
These Windsor breads are not just super soft! They are ultimately soft!!! So soft that their golden brown crust are super soft too! Yum!!!
 |
| Windsor Bread (温莎面包) |
"Wow! I love these breads!!!" After baking and tasted the softness of these breads, I told myself that I have to try using this recipe to bake sandwich breads. And I did!
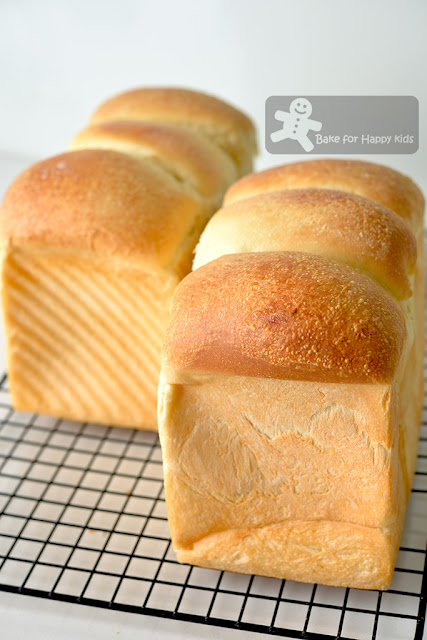
Sadly, these breads are so soft that they can only be perfectly baked as bread buns, not sandwich loaves! Regardless of any size and shape, the crusts of these breads are too soft and not rigid enough to support any shape, making the breads shrinking slightly while cooling. It is worse for the tall loaves because their soft crusts are unable to support their frames causing them to tilt one side or both after they are thoroughly cooled! Alamak!!!Now we know, these triple super soft breads are going to shrink and can’t stand properly. So, I asked myself... Should I modify this recipe to make these breads looking more perfect? Nay because I know that the modified bread are not going to super duper soft! Hmmm... Does this mean that I am going to bake sandwich breads with this recipe again? Definitely YES! And I wouldn’t even think twice saying yes! Although food with appealing looks can make them more desirable to me, it is the taste and texture that make the food ultimately delicious. Would you do the same?
Hence, I’m going to say that I like this recipe! I would highly recommend it too! And I don’t even mind baking these titled sandwich breads!!! Even my son told me that he likes these oddly-shaped super soft breads! LOL!
Just in case that you don't agree with me, I'm going to include a loud WARNING remark saying "If you are using this recipe to bake sandwich breads, please note that these soft- crusted breads will shrink slightly after cooling and won’t stand well causing them to be slightly imperfectly-shaped." Just in case...
 |
| My Windsor Sandwich Loaves Still looking ok in this photo because they are just starting to shrink... |
I know... Some of you might ask if you can bake these breads without the sugar topping. Of course, you can but I have to say that the breads with sugar topping are really good! Although I'm a health-conscious person, I won't really mind baking these yummy bread with an extra 1 teaspoon of icing sugar. Plus, your breads with sugarless top won’t look glossy and nice just like the ones dusted with sugar like mine...
However, I have noticed that if the breads with too generous coating of sugar can make the bread brown a little more during baking, resulting the bread to be less soft on the next day or so. So, if we are not going to eat all of these bread within the same day of bake, I would suggest to dust the bread moderately with sugar so that the breads can stay soft for a longer period of time.
 |
| OMG! These breads are so soft!!! |
 |
| Wow! I love these breads!!! And I will bake them again! |
Here's a video showing how I baked these ultra soft breads. My son said that they smell so nice just like the jam donuts... LOL! We love this recipe! Would you?
This recipe reminds me of another super soft bread recipe that I have been exploring... and I would love to share it at my blog too. So stay tune if you are interested.
If you like my recipes and want more, it will be nice if you can LIKE, SHARE and FOLLOW me my Facebook at here or here or my Instagram @zoebakeforhappykids because every LIKE, SHARE and FOLLOW from you will motivate a hardworking working mum like me to share more! Thank you for your support!!!
Here's the recipe that is adapted from My Mind Patch
To bake twelve 20cm buns in one 25 x 35 cm tray:
220g water at mild room temperature, about 25°C
30g egg yolk - from about 2 eggs but please use the exact weight
375g bread flour with 12% protein
12g milk powder
35g caster sugar
3g salt
30g unsalted butter, softened at room temperature
1 1/4 tsp (5g) yeast
To bake two 10 x 20 cm loaves:
WARNING: These sandwich loaves will shrink after cooling. Plus, the crust will be so soft that the loaves won't stand properly. Hence, please do not use this recipe to bake sandwich loaves if you are after perfect looking breads. If you choose to use this recipe to bake these sandwich loaves, please do not bake these breads with loaf pan lids so that the shrinking will be minimised.
380g water at mild room temperature, about 25°C
50g egg yolk - from about 3 eggs but please use the exact weight
650g bread flour with 12% protein
20g milk powder
40g caster sugar - original is 60g and can be reduced to 40g.
4g salt
50g unsalted butter, softened at room temperature
2 tsp (8g) yeast
For brushing:
3-4 tbsp cream, with 35% fat
1-2 tsp icing sugar to dust
extra butter or vegetable oil spray to grease baking tray or loaf pans
extra bread flour for dusting and shaping but please use the minimal amount
If you are using a breadmaker to knead and prove, add all ingredients into the breadmaker according to this order. Use "dough" setting to mix and knead dough for 30 mins or until the dough is smooth and elastic. Allow the dough to prove for 60 mins.
If you are using an electric mixer with an hook attachment to knead, combine all ingredients except butter in the mixing bowl and mix at low speed until a soft dough forms. Then, knead in the butter until incorporated. Continue to knead at low speed for at least 25 mins or until the dough is smooth and elastic. It is important that the dough has to be elastic and stretchy. Cover the dough and allow the dough to prove in a warm and humid place for about 60 mins or until doubled in size.
To shape the bread into 15 cm buns:
Grease one 25 x 35 cm baking tray with butter or vegetable spray.
Divide dough into into 12 equal portions, 58g each. Shape all portions of dough into smooth balls. Allow them to rest at room temperature for about 10 mins.
Using a lightly floured rolling pin, roll each portion into long and flat oval shape (about 20 cm long) on a lightly floured non-stick surface. Use your fingers to pick one longer side of the dough and tuck and roll the dough tightly like a Swiss roll. Each portion should look like a long 20cm bun. Repeat this shaping step with the remaining 11 portions.
Arrange all shaped dough with their seams side down evenly (in a single row) in the prepared tray. Press the dough slightly to form an even surface. Allow the dough to prove in a warm and humid place for another 60 mins or until the dough looks doubled in size.
To shape the dough into bread loaves:
Grease 10 x 20 cm loaf pans with butter or vegetable oil spray.
Divide dough into into 6 equal portions, 115g each. Shape all portions of dough into smooth balls. Allow them to rest at room temperature for about 10 mins.
Using a lightly floured rolling pin, roll each portion into long and flat oval shape on a lightly floured non-stick surface. Use your fingers to pick one shorter side of the dough and tuck and roll the dough like a Swiss roll. Use the rolling pin to flatten and roll the dough into a long rod shape. Then, pick one shorter side of the dough and roll it like a Swiss roll again. Repeat this rolling step with the remaining portions of dough.
Place three rolled dough with their seams side down into the each prepared pan. Press the top of the dough lightly to form an even surface. Allow the dough to prove in a warm and humid place for another 60 mins or until the dough is going to reach the maximum height of the loaf pan.
To bake:
Brush bread dough with cream and dust the top of the breads moderately or generously with icing sugar. If you don't intend to eat the breads within the same day, it is best to dust the breads moderately with icing sugar so that they will brown lesser and stay softer for a longer period.
Bake in a preheated 180°C (350°F) oven for 15 mins for the buns or 25 mins for the bread loaves or until thoroughly baked. For the loaves only: if the top of your loaves are becoming brown too quickly, cover the breads very loosely with aluminium foil at the last 5-10 mins of bake and continue to bake until thoroughly baked.
Remove the breads from the loaf pans and tray immediately and transfer onto a wire rack to cool completely before slicing and serving.
To store, wrap tightly in plastic wrap and keep at room temperature for 2-3 days or freeze in serving portions for 2-3 months.
Happy Baking
